Introduction:
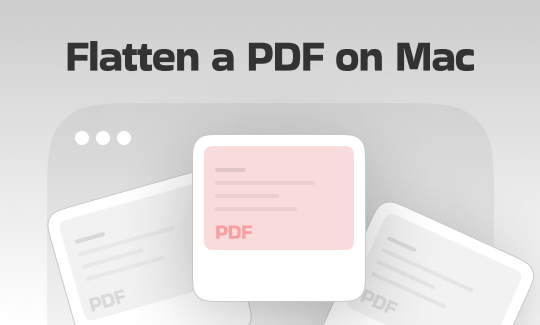
Have you ever filled out a digital form on your computer and worried that someone might change your typed answers? Luckily, learning how to flatten a PDF on Mac solves this issue instantly. It locks your text so nobody can change it. Let’s explore how to do this quickly and easily.
Should You Flatten a PDF?
Before you change your document, it is important to understand what this process actually does.
When you flatten a document, you combine all its layers into a single, flat image. That’s to say, you will completely remove layers from the PDF. Once it is flat, those interactive text boxes are gone forever.
When You SHOULD Flatten Your Document:
✅ Securing Forms: If you sign a legal contract, a lease agreement, or a job application, you want your data to be safe. Flattening locks your signature and your answers into the page permanently.
✅ Improving Printing Quality: Flattening can ensure the printed output of the document matches what is displayed on the computer screen.
✅ Following Upload Rules: Many government websites, school portals, and legal databases require you to upload flat documents.
When You SHOULD NOT Flatten Your Document:
If you Need to fix mistakes later: Flattening is permanent. Therefore, you should never flatten your one and only copy. It’s better to keep an original copy in case you need to make future edits.
Way 1. Flatten a PDF on Mac Using Preview
As a Mac user, you do not need to buy new software to do this basic task. Your computer has a wonderful free built-in program called Preview.
Preview is the default app that opens pictures and documents. It has a clever “printing” trick that quickly flattens a PDF on a Mac.
Follow these simple steps:
1. Double-click the PDF to open it normally in the Preview app.
2. Look at the top menu bar on your screen. Click the word File, and then move your mouse down to select Print. You can also just press the Command and P keys on your keyboard at the same time.
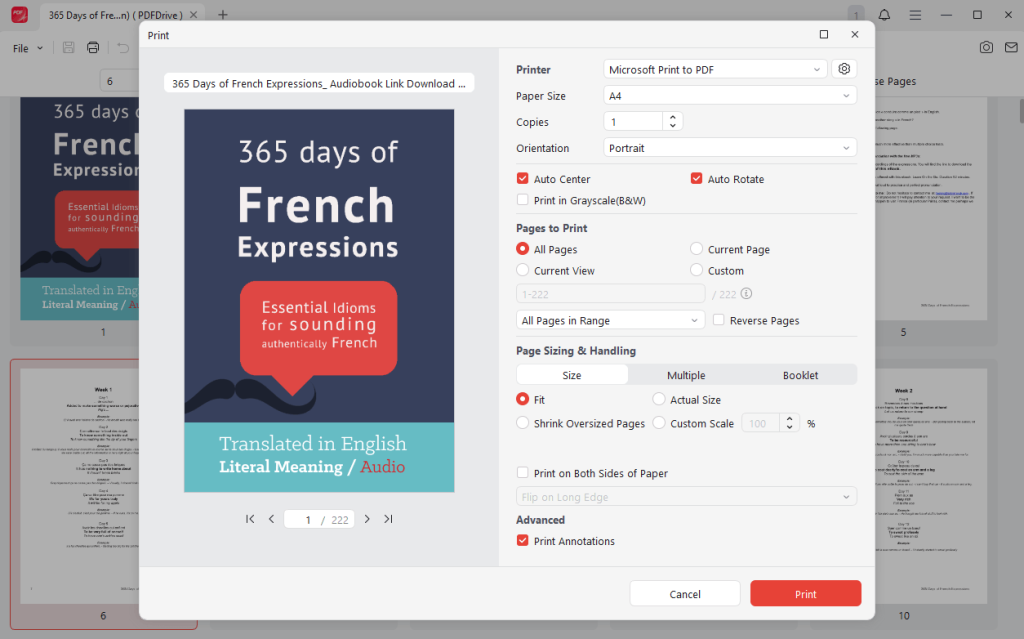
3. A new Print window will pop up on your screen. Look at the bottom center or bottom left of this window. You will see a small button with a downward arrow labeled PDF.
4. Click that small downward arrow. A small list will appear. Select the Save as PDF option.
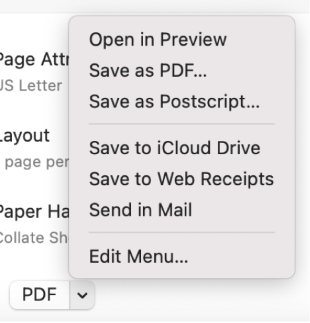
5. Your computer will ask you where you want to save this new file. Give the file a brand new name (for example, “My Form_Flattened.pdf”). This is very important so you do not accidentally erase your original file. Click Save.
The new file you just saved is now completely flat. By tricking the computer into “printing” the file to your hard drive, it converts all editable form fields into permanent, locked images on the page.
Way 2. Flatten a PDF on Mac with JOPDF
Want a more powerful tool than the basic Mac tools? JOPDF is a good choice. As one of the best PDF editors for Mac, it is very easy to use, incredibly fast, and handles heavy workloads perfectly. Like Preview, you can easily flatten your document by printing.
Here are the specific steps to flatten your file:
1. Open your document in JOPDF.
2. Look at the top menu and click the Print button.
3. A print menu will pop up on your screen. Instead of choosing your real paper printer, select Save as PDF.
4. Rename your file and click Save. Your new document is now completely flat, and your form answers are locked!
In fact, JOPDF offers many other amazing functions besides flattening. For example, if you find a spelling mistake, you can use the editing tools to fix the text directly on the page, just like typing in Microsoft Word.
Furthermore, JOPDF allows you to easily password protect a PDF on Mac. This means you can add a secret lock to your file. If someone tries to open it, they will see a blank screen unless they enter your secret password.
If you want to make your document work simple, professional, and safe, download and try JOPDF today!
Way 3. Flatten a PDF in Adobe on Mac
Adobe Acrobat Pro is an incredibly powerful PDF flattener. It gives you total control over how the layers are merged.
However, please remember that this method requires an expensive paid subscription. The free Adobe Reader version you download from the internet cannot do this.
The steps:
1. Launch Adobe Acrobat Pro and open the document you want to change.
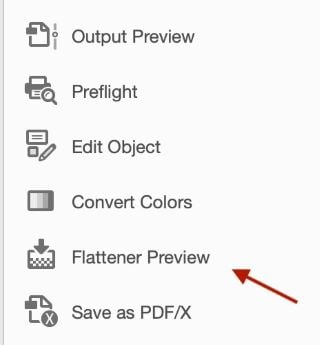
2. On the right side of your screen, click the Tools tab. Go to Print Production > Flattener Preview.
3. Next, adjust the Raster/Vector Balance slider as needed.
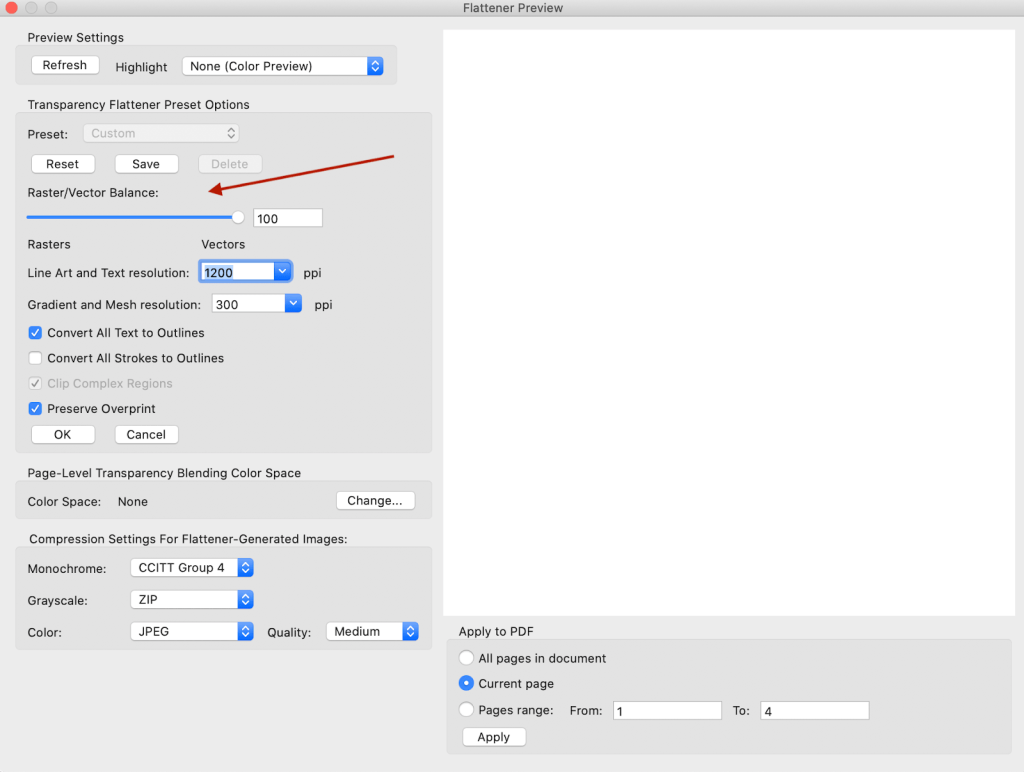
4. Then, select Convert All Text to Outlines (if you want the text printed with the same weight) and deselect Clip Complex Regions.
5. Finally, click Apply to confirm.
If you want to edit a PDF for free, try JOPDF. This powerful alternative to Adobe Acrobat offers many features, all of which are available for free.
Conclusion
Knowing how to flatten a PDF on Mac is an essential skill. It helps you secure your digital forms, protect your digital signatures, and ensure your important documents print perfectly every time.
The built-in Preview app is a wonderful, free option for a quick fix. Adobe Pro is for printing professionals who already pay for a subscription. Finally, if you want the perfect all-in-one software, JOPDF is the best choice. It can help you easily edit and protect your PDF documents.
FAQs
Table of Contents
Your Best Free PDF Expert in PDF editing, compressing, converting, annotating, protect, organizing, and more.
Free DownloadWindows · macOS · Linux
Queena
Editor
“As a staff editor for JOPDF, Queena excels at guiding users to the optimal tools and solutions. When she's not analyzing the latest PDF solutions, she enjoys spending her free time playing with her four cats.”