Summary :
You got a PDF file containing images from others, and you want to swap out one image for another. Or, you need to add a new picture on top of the existing pages. Sometimes you even wish to change the image’s appearance. Fortunately, various PDF image editors support these operations. This JOPDF article guides you through how to edit images in a PDF painlessly with three easy ways.
Way 1: Edit Images in PDF with JOPDF
If you need a free PDF editor to edit text and images in PDF files without messing up the layout, JOPDF is the choice. The lightweight software offers you complete control over PDF formatting and content. It is available for Windows and Mac. It allows you to replace, resize, flip, rotate, crop, move, and add images in a PDF smoothly. You can also copy, cut, and paste pictures.
Here is how to edit images in a PDF using the JOPDF application for Windows or Mac.
Step 1: Download the PDF image editor, install it, and launch it.
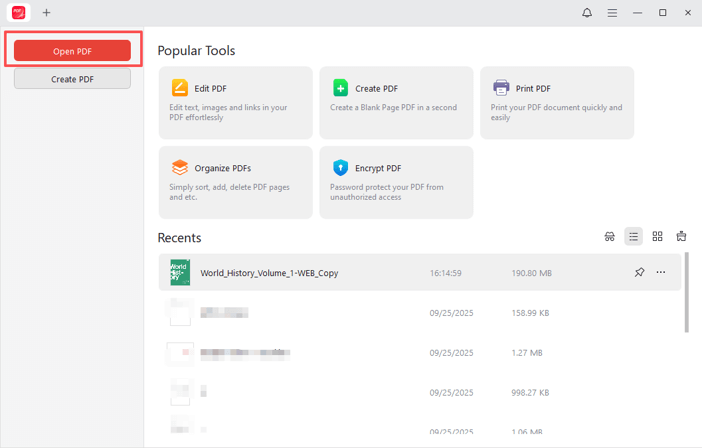
Step 2: Click the top left Open PDF button to select the PDF you need to edit images in and open it.
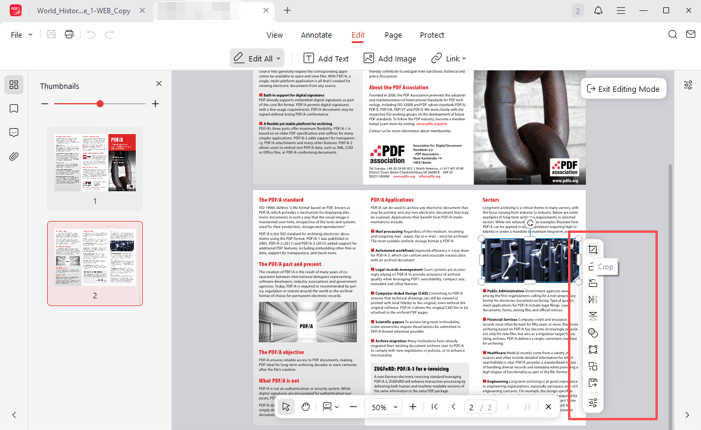
Step 3: Go to the Edit main menu and ensure the Edit All button is selected.
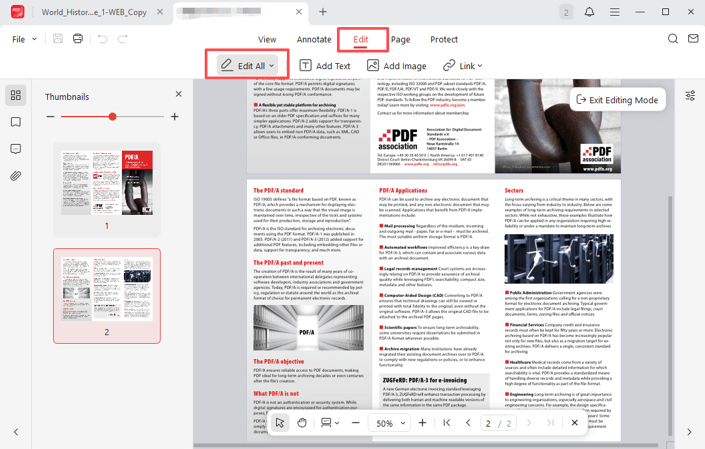
Step 4: Select an image and choose a pop-up editing option, such as Crop, to edit the PDF image for free.
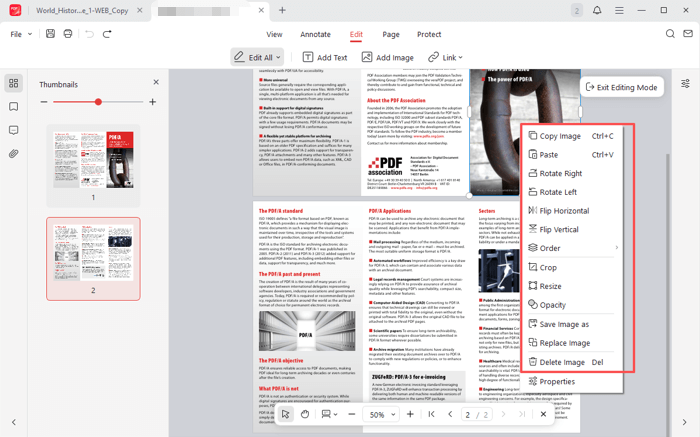
Step 5: You can also right-click to select an option to edit, delete, or extract the image. Then, save the file.
Way 2: Edit PDF Images in Adobe Acrobat
A powerful way to edit images in a PDF is to use Adobe Acrobat. If you’re a business or have a budget, you can subscribe to the Acrobat Pro or Standard. The free Adobe Reader doesn’t offer editing capabilities. The PDF editor allows for editing text, pages, signatures, images, and forms without much effort. Mac users need to turn to the pro version.
Dive into the process of editing images in PDF files using Adobe Acrobat.
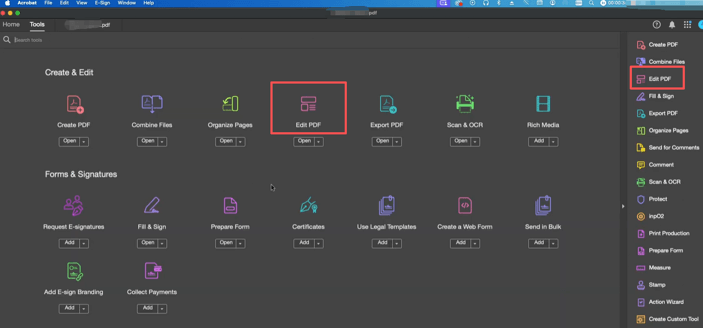
Step 1: Import your PDF file into the software, and click Edit PDF in the side panel or click Tools > Edit PDF.
Step 2: Click on an image, and you can drag to reposition it or pull the bounding box handle to change its dimensions.
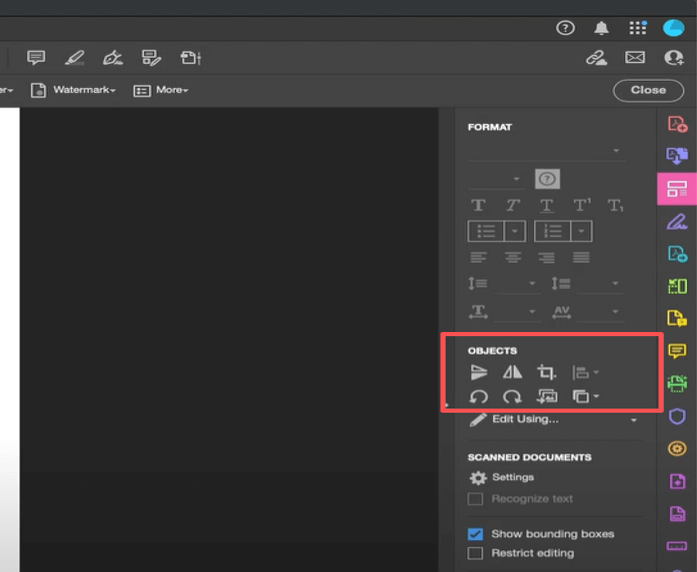
Step 3: In the right pane, use the editing tools under OBJECTS to do your image editing in the PDF. You can rotate, align, and perform additional actions.
Step 4: Click out of the image and save the changes to the edited PDF.
Way 3: How to Edit Images in a PDF in Foxit PDF Editor
Foxit PDF Editor is a good solution when it comes to how to edit images in a PDF document. This professional software offers a range of advanced tools to enhance image effects. You can directly edit images and charts and add image annotations or filters within a PDF file. Foxit allows you to replace, add, center, and paint pictures. It can also make PDF text editable.
Check out the method to edit PDF images with Foxit PDF Editor.
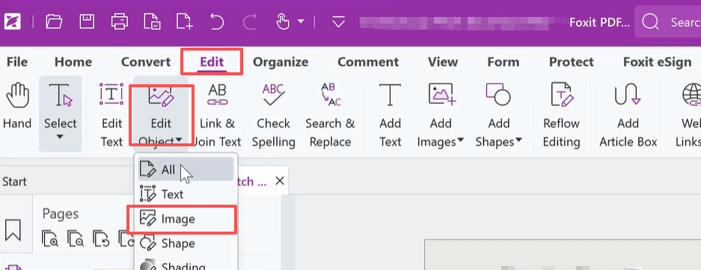
Step 1: Open your PDF file with the program, and click Edit > Edit Object > Image.
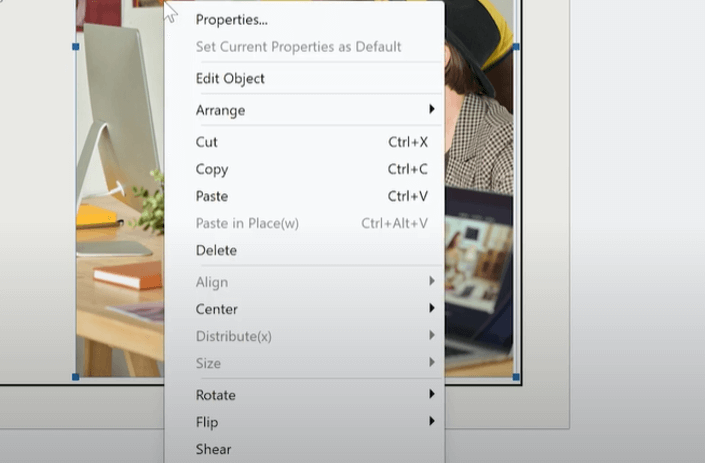
Step 2: Select the image and right-click to choose an editing option, such as Rotate or Flip, to modify it.
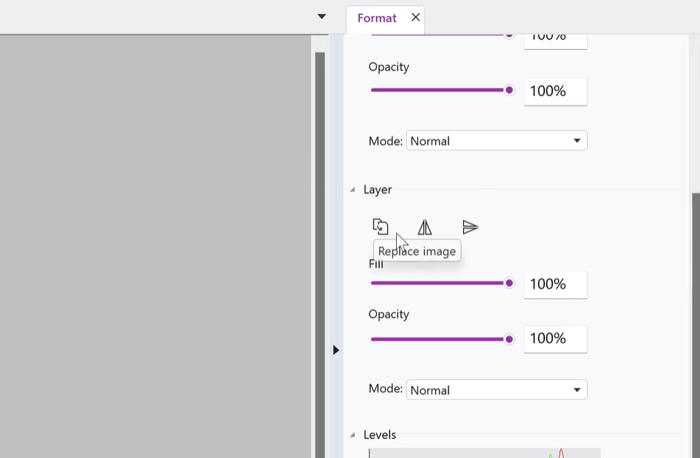
Step 3: Click “Edit Object” in the context menu, and use the tools in the Format panel to replace, flip, or further modify the image.
Step 4: You can click Select and choose Paint Bucket or other image editing tools at the top to edit the image in the PDF further.
Step 5: Click Save to apply the modifications. You can also choose Add Images under the Edit tab to insert additional pictures.
Conclusion
You may find that online PDF editors only allow you to annotate a PDF or perform minor tweaks to the file. That’s not truly editing. You’ll need offline applications to edit images in a PDF file in a real sense. If you would like to invest in productivity software for your company, all three recommended methods are worth trying. For beginners or individuals who prefer to spend no cost, don’t miss out on JOPDF which can even help edit a locked PDF.
FAQs
Table of Contents
Your Best Free PDF Expert in PDF editing, compressing, converting, annotating, protect, organizing, and more.
Free DownloadWindows · macOS · Linux
Selena
Staff Editor
“Selena is a staff editor working for JOPDF, passionate and committed to providing how-to and round-up articles. Over 8 years of specialized skills and experience in PDF solutions, hoping to help users ease their lives and solve whatever they encounter. "Work smarter, not just harder!"”
![How to Combine PDFs in Preview in 2026 [2 Best Ways]](https://b.jopdf.com/wp-content/uploads/2026/03/how-to-combine-pdfs-in-preview.png)
![How to Compress a PDF on Mac [4 Best Ways and Practical Tips]](https://b.jopdf.com/wp-content/uploads/2026/03/how-to-compress-a-pdf-on-mac.png)