Introduction
Need to send resumes, share reports, or archive documents? PDF files are the go-to choice. For Mac users, you can accomplish these tasks using free built-in tools or third-party apps—no need to buy expensive software. Check to learn how to create a PDF on Mac for FREE!
Way 1. How to Create a Blank PDF on Mac
Your macOS doesn’t have a direct “New Blank PDF” option. Therefore, to create a PDF from scratch, a professional PDF creator is needed. While most PDF tools require a subscription, we’ve found one that’s completely free! That’s JOPDF.
JOPDF is a comprehensive PDF tool that supports PDF creation, editing, annotation, protection, and more. What’s more, it has a simple workflow that lets you create a clean, standard-sized blank PDF in just a few clicks.
Here is how to create a PDF on Mac with JOPDF:
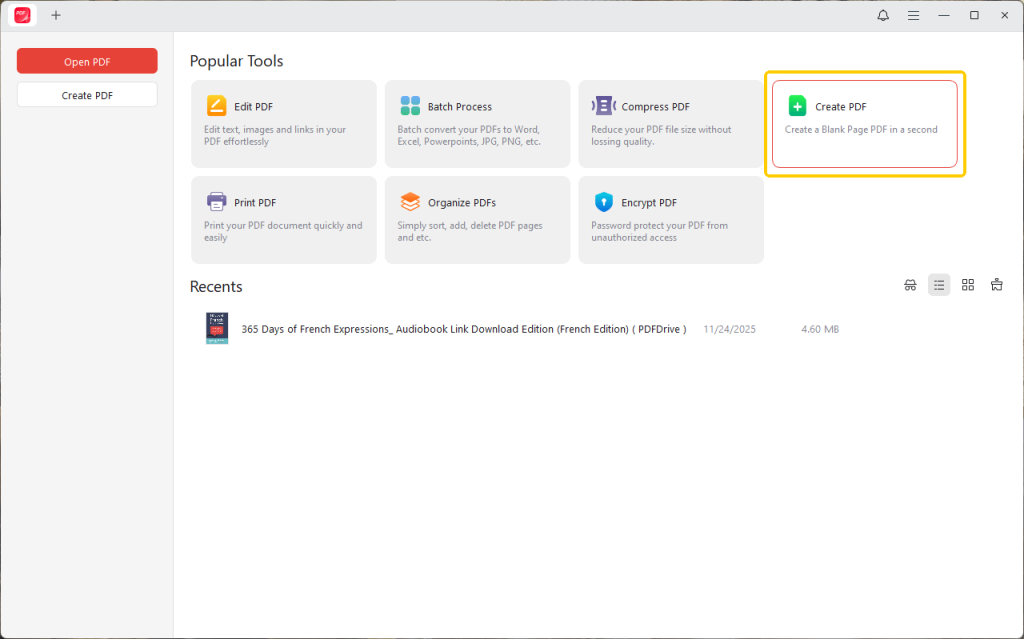
1. Download and launch JOPDF on your Mac.
2. Click the Create button on the home page.
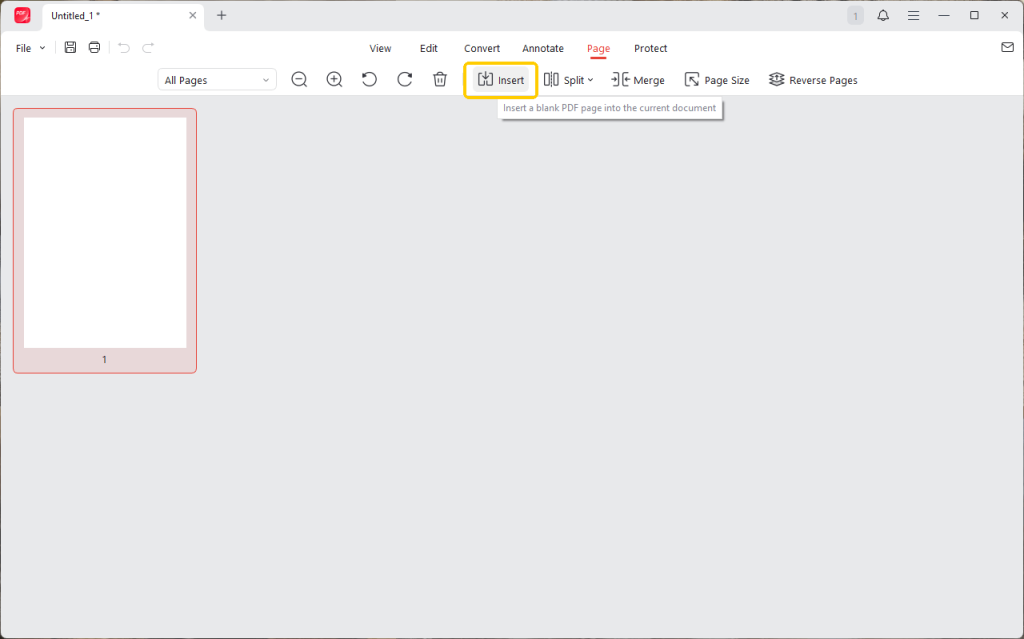
3. Next, you will see an editable blank PDF file. To add more pages, please go to Page and click the Insert button. It also lets you adjust the page size and orientation.
4. Now, you can go to Annotate or Edit to make any changes. JOPDF lets you easily add text, images, shapes, and even draw on a PDF freely.

5. When OK, click the Save button and select a location to save the document.
As you can see, JOPDF not only helps you create PDF files but also assists you in editing them. As one of the best Mac PDF editors, it offers a complete set of tools to help you manage PDFs. Best of all, it’s completely free! There’s no reason not to give it a try.
Way 2. Create a PDF on Mac via “Print to PDF”
The “Print to PDF” function is not a physical print command but a powerful digital converter built into the operating system.
You can use it to create a PDF from a application that has a print option—including web pages, emails, notes, and documents. The good news is that it will perfectly preserve the original layout, fonts, and images.
Let’s find out how to make a PDF on Mac with the “Print to PDF” feature:
1. Open the file, webpage, or document you want to convert into a PDF.
2. In the menu bar at the top of the screen, go to File > Print…, or use the universal keyboard shortcut Command + P.
3. The print dialog box will appear. In the bottom-left corner, click the small dropdown menu that says “PDF“.

4. From this menu, select “Save as PDF”.
5. A save window will open. Give your new PDF a name and choose where you want to save it.
6. Finally, click Save. The document will be converted and saved as a PDF instantly.
Way 3. Make a PDF on Mac from Word, Excel, PPT
Microsoft Office apps like Word, Excel, and PowerPoint have a direct, built-in function for saving your work as a PDF. It provides specific options to optimize the file for either electronic sharing or professional printing. You can also get control over the final quality and file size.
See how to create a PDF on Mac from Office:
1. Open your document in Microsoft Word, Excel, or PowerPoint.
2. Go to File and select Save As….
3. Then, click the File Format dropdown menu and select “PDF” from the list.
4. You will see options to optimize the file. Choose “Best for electronic distribution and accessibility” for a smaller file size perfect for emailing, or choose “Best for printing” for a higher-quality, larger file.
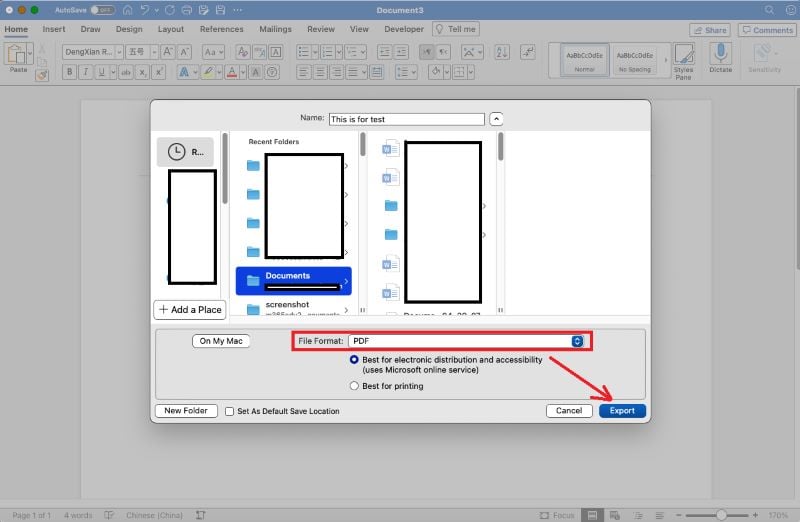
5. Click the Export or Save button to make it.
Way 4. Make a PDF on Mac from Images
Whether you’ve scanned a document, taken a screenshot, or have a collection of photos, your Mac’s built-in Preview app makes it incredibly easy to convert them into a PDF.
It lets you turn a single image into a PDF or combine multiple images into a single multi-page document.
Check to learn how to make a PDF on Mac from images:
1. Select all the image files you want to include in your PDF.
2. Right-click any image and choose Open With > Preview.
3. In the thumbnail sidebar, drag and drop the images to reorder them.
4. Once you are happy with the order, go to the menu bar and select File > Export as PDF…

5. When you see the print dialog box, click the “PDF” dropdown menu in the bottom-left corner.
6. Name your new PDF and save it.
Way 5. Make a PDF on Mac with Multiple Files
What if you want to create a PDF from multiple files? The Quick Actions can be helpful. It is a brilliant, little-known feature in Finder that allows you to instantly combine different types of files—like images, text documents, and even existing PDFs—into a single, merged PDF.
Read on to learn how to create a PDF on Mac with multiple files:
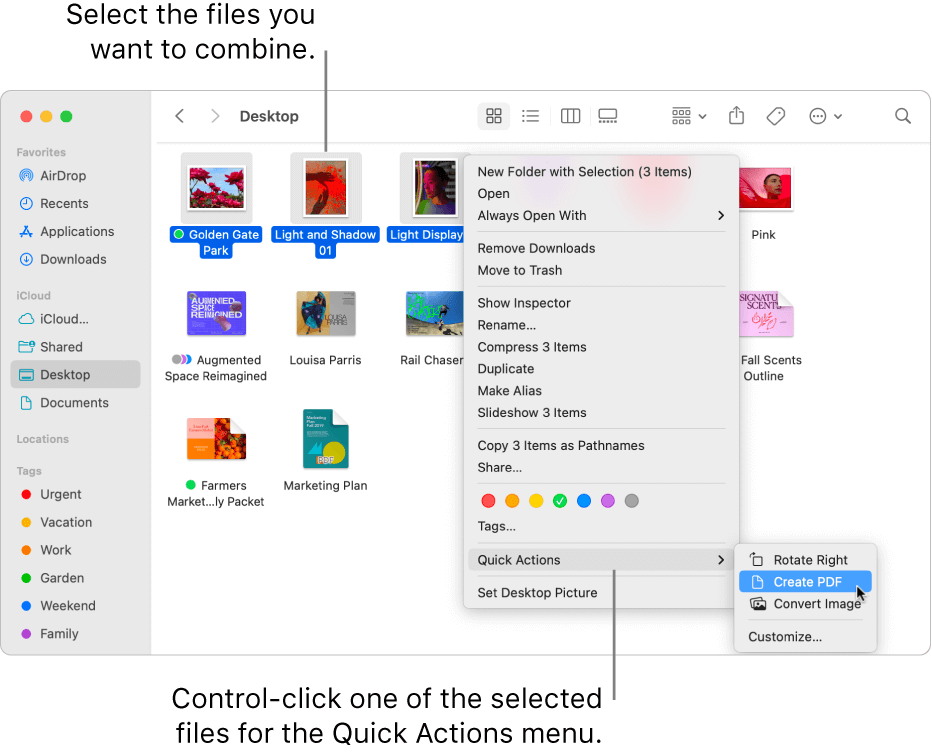
1. Locate all the files you want to combine in a Finder window.
2. Select all the files. The order in which you select them will be the order they appear in the final PDF. Then, right-click them and choose Quick Actions > Create PDF.
Your Mac will instantly process the files and create a new, single PDF document in the same folder. The new file will be named after the first file you selected. You can then rename it as you wish.
Conclusion
That’s all about how to create a PDF on Mac. To start from scratch, the professional JOPDF is the way to go.
When you need to create a PDF from an existing file, you can utilize the built-in Print to PDF feature, the Preview app, and smart Finder operations.
What’s more, after the conversion, you can use JOPDF to edit PDFs on your Mac. With JOPDF, you produce PDF files on your Mac like a pro!
FAQs
Table of Contents
Your Best Free PDF Expert in PDF editing, compressing, converting, annotating, protect, organizing, and more.
Free DownloadWindows · macOS
Queena
Editor
“As a staff editor for JOPDF, Queena excels at guiding users to the optimal tools and solutions. When she's not analyzing the latest PDF solutions, she enjoys spending her free time playing with her four cats.”