Introduction
Sometimes, you need to add arrow to PDF to highlight details, point out errors, or guide readers clearly. Arrows make explanations sharper and communication faster. Ready to enhance your document? Discover the 4 simplest, free, and pro ways to add arrows to your PDF.
Way 1. Add Arrow to PDF with JOPDF (Win & Mac)
👍 Best For: Anyone seeking a fast, reliable, and entirely free tool to annotate documents effectively.
JOPDF is an entirely free, easy-to-use PDF editor available for both Windows and Mac. It lets you add arrows, highlight text, and even edit PDF on Mac without limitations.
With its 15+ annotation tools and simple interface, you can quickly enhance your PDFs. JOPDF stands out as a one-stop PDF editing tool delivering pro results without registration.
Learn how to add arrow in PDF using JOPDF in a few clicks.
Step 1. Download the JOPDF installer from the official website or click the Download button.
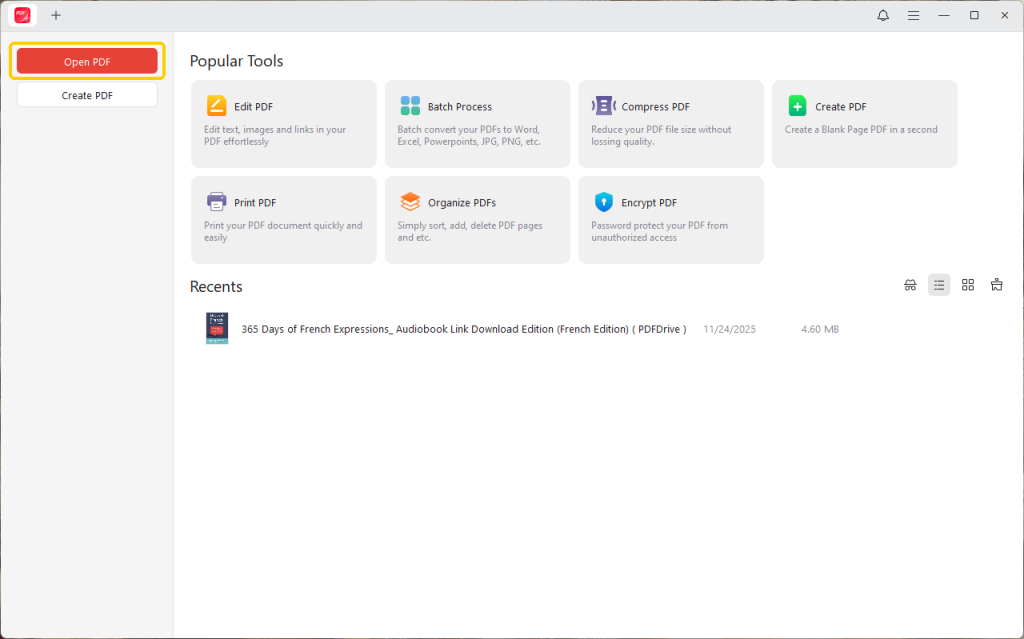
Step 2. Import the target PDF document by clicking the Open PDF button or by dragging and dropping it.
Step 3. Go to the Annotate tab and open the Shapes option. And choose the Arrow icon. Select the color you like, customize the opacity and thickness, and drag the cursor to add the target shape.

Step 4. Once you are done, click the Save icon in the top-left corner or press Ctrl+S to save the annotated PDF.
Way 2. Add Arrow to PDF in Adobe Acrobat Reader
👍 Best For: Users seeking dependable, professional tools to annotate documents with accuracy and efficiency.
Adobe Acrobat Reader provides powerful features to annotate a PDF, making it simple to add arrows and emphasize key details. The markup tools are simple yet precise, making them great for collaboration, reviews, and drawing attention to key information.
Acrobat Reader is free to use, offers essential features, and is ideal for consistent, high-quality document editing.
Step-by-step instructions for how to add arrow in PDF through Adobe Acrobat Reader:
Step 1. Launch Adobe Acrobat Reader, then open the PDF you want to edit.
Step 2. Go to the Tools tab and select Comment. Or, find the Comment tools in the right-hand pane.
Find and click the Drawing Markups or Shape icon and select the Arrow tool. Click and drag the mouse on the PDF to create an arrow.
Step 3. Right-click the drawn arrow and choose Properties to change its parameters. Adjust the color, thickness, opacity, and the style of the arrow’s start and end points (e.g., open, closed, diamond).
Step 4. Go to File and click Save. Alternatively, tap File > Save As to save your PDF along with the added arrow.
Way 3. Add Arrow to PDF Using Preview
👍 Best For: Mac users seeking a native option to add or draw arrow in PDF files.
Preview, the safe Mac default tool, lets you draw on a PDF and add arrows to highlight key points. It’s simple to operate and software-free, though Preview cannot edit text already in the PDF. If necessary, they can use JOPDF instead.
Step 1. Navigate to the Preview app on your Mac computer.
Step 2. Open the PDF you wish to annotate and draw an arrow in.
Step 3. Hold down the Command + Control + i keys on your keyboard to open up the markup toolbar across the top.
Step 4. From the Shapes dropdown menu, click the Arrow icon. And place it on your document wherever you feel necessary.
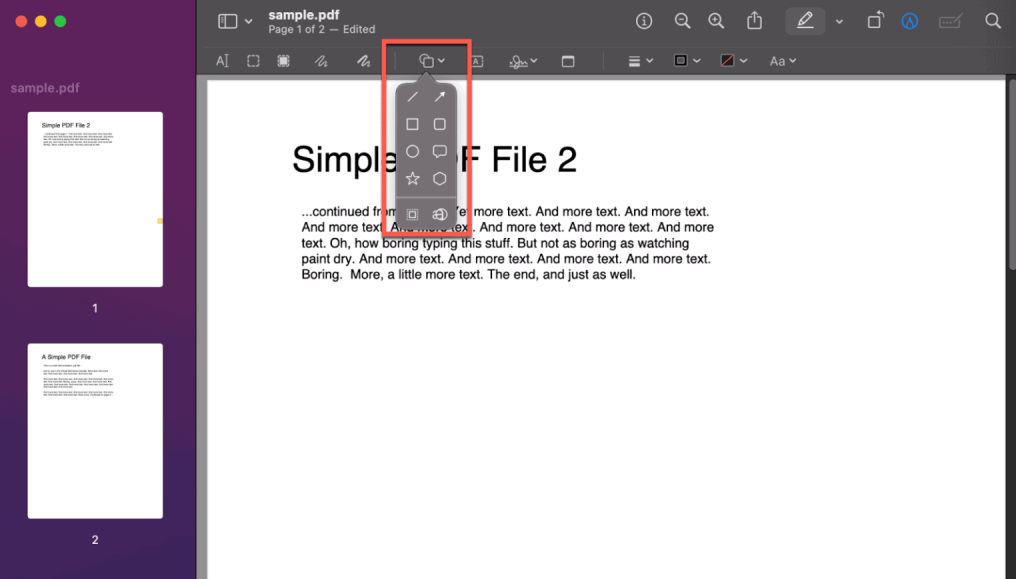
You can change the color and thickness, adjust the length, or reposition the arrow from the menu icon above (in the toolbar).
Step 5. Once satisfied, go to File and click Save to save your edited PDF. Or hit the Share icon at the top to share the PDF via several different mediums.
Way 4. Add Arrow to PDF Online
👍 Best For: Adding arrows on the go using online tools, no software installation needed.
PDFgear is a versatile PDF editor that delivers a full suite of management and editing functions. It supports editing PDFs, organizing PDF pages, adding shapes to PDFs, compressing PDFs, and more.
With PDFgear, you do not need to install any software. It is completely ad- and watermark-free, making it easy to add arrows to PDFs with just a few clicks.
Find out how to add arrow to PDF online fast with PDFgear.
Step 1. Open the online PDF editor PDFgear in your browser to get started. Click Select PDF File to browse and upload your desired PDF.
Step 2. In the top menu bar, tap the Add Shapes icon. And then, click the Arrow shaped (Add Arrow) icon.
Step 3. Select a place on the document where you wish to add the arrow. Drag the cursor to decide the length of the arrow.
Step 4. Select the arrow, right-click it, and choose Properties. Then start customizing properties such as Start Arrow, End Arrow, Line Style, Fill Color, Line Color, Opacity, and Line thickness. Then select OK.
After customizing the arrow properties, click Download PDF to download and save the newly annotated PDF.
Troubleshooting: Why Can’t I Add an Arrow to My PDF?
Sometimes you can’t add an arrow to your PDF because the file is secured or set to read-only. If you can’t access the PDF, request the password or a version without restrictions from the author.
With the password in hand, you can remove password from PDF via JOPDF. After removing restrictions, you can add arrows and edit the PDF without limits.

Quick Wrap Up
Arrows boost clarity, improve communication, and enhance document presentation. Learning how to add arrow to PDF is easy when you use the right method.
Whether you rely on JOPDF for a free, all-in-one editor, Adobe Acrobat Reader for professional markup, Preview on Mac, or other online tools, each option simplifies annotation. Choose any method above and start enhancing your PDFs effortlessly!
FAQs
Table of Contents
Your Best Free PDF Expert in PDF editing, compressing, converting, annotating, protect, organizing, and more.
Free DownloadWindows · macOS · Linux
Queena
Editor
“As a staff editor for JOPDF, Queena excels at guiding users to the optimal tools and solutions. When she's not analyzing the latest PDF solutions, she enjoys spending her free time playing with her four cats.”